Showing posts with label Baking Partners. Show all posts

Friday, April 1, 2016

Vegan Potato Knish | Baking Partners April 2016

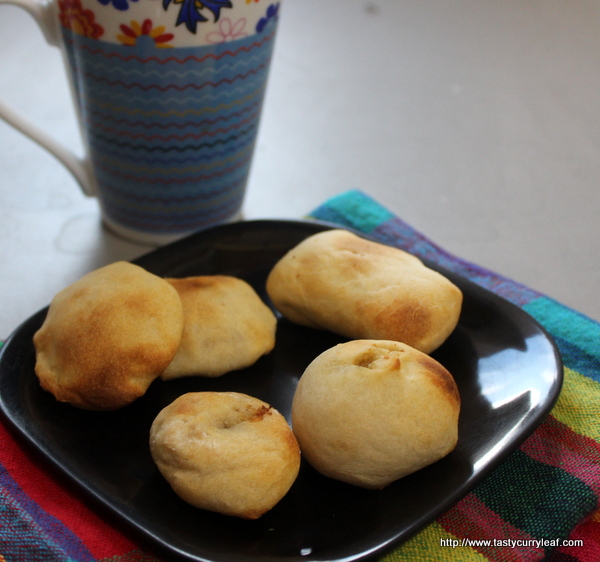
Knish is an Eastern European snack consisting of usually potatoes and meat filling in a doughy crust and can be either baked,grilled or deep fried. Made popular in USA by the Eastern European immigrants, a Kentucky Knish version has also come up. Knishes can be made round rectangular or square with filling completely covered or peeping out.
IMG_0702.JPG

For this months Baking Partners Challenge by Swathi Knish was tried out by Yours Truly. That too a vegan knish  from here with a tofu filling from here and in 3 different shapes.
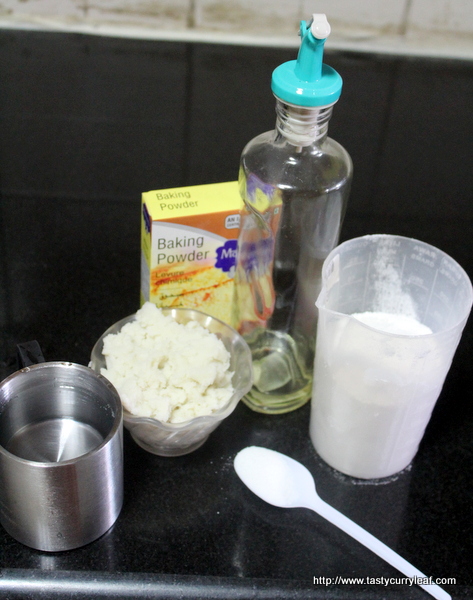
Ingredients:

Mashed Potatoes: 1 cup
Oil: 1 tbsp
Salt: 1 tsp
All Purpose Flour: 3 cups
Baking Powder: 1 tsp
Cold water: 1/2 cup (+ 1/4 cup)
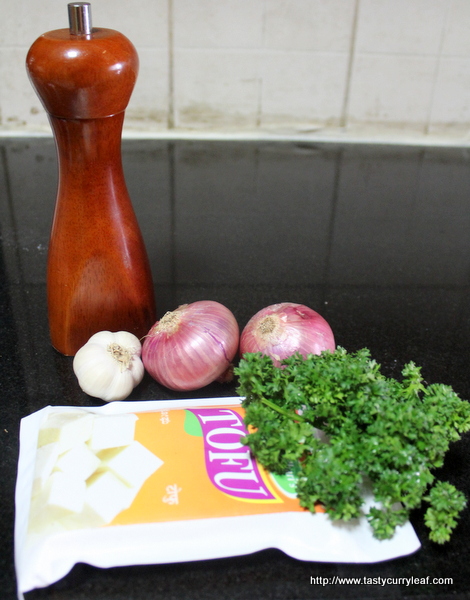
IMG_0644.JPG


Filling:
Oil: 1 tbsp
Chopped Onions: 1 cup
Tofu: 1.5 cup mashed
Fresh Parsley: 1/4 cup

Garlic Powder :1/2 tsp OR Garlic cloves: 2-3 minced

Black pepper: 1/4 tsp or as per taste
Salt: 1 tsp +/- as per taste
Other spices : as per taste
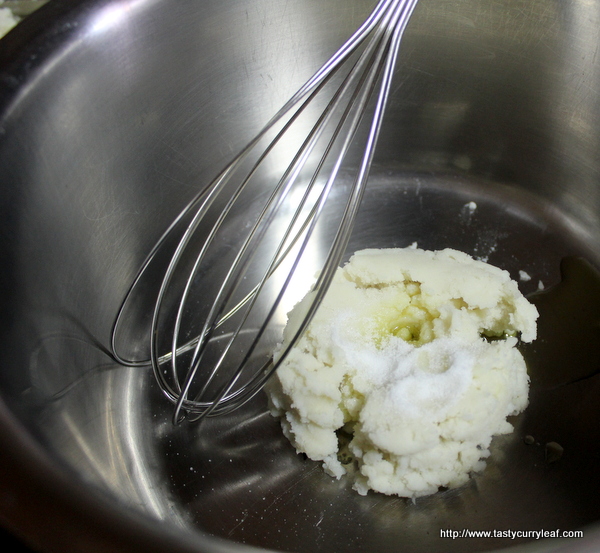
IMG_0654.JPG


Preparation:

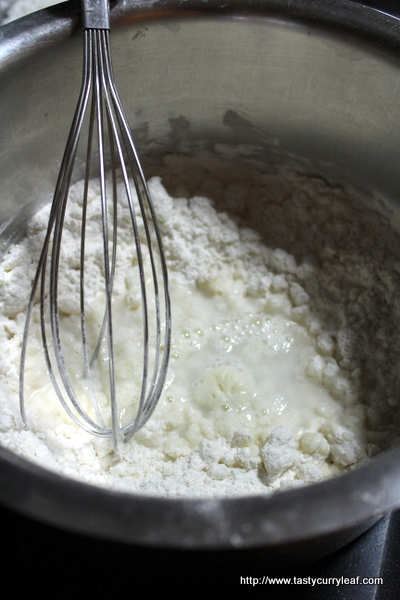
In a big bowl, beat together mashed potatoes, 1 tbsp of oil and 1 tsp of salt.
IMG_0655.JPG

Add the flour and baking powder and mix well.
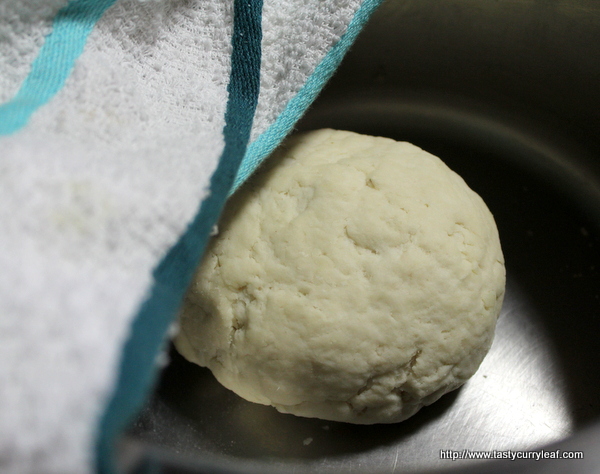
Mix in water and knead into a soft and smooth dough. More water might be needed depending on how moist your mashed potatoes are.
IMG_0658.JPG
Let it rest in a bowl or counter covered with a cloth or plastic wrap for 30 minutes.
IMG_0659.JPG

Meanwhile prepare the filling.

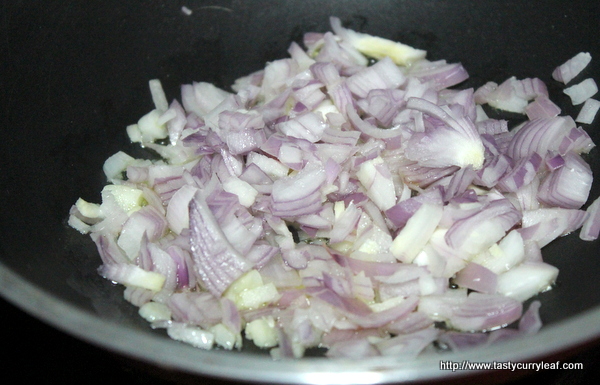
Heat oil in a deep pan and saute oinions and minced garlic until transparent.

IMG_0661.JPG

Add the scrambled/grated/mashed tofu along with parsley, salt and other seasonings.
IMG_0663.JPG
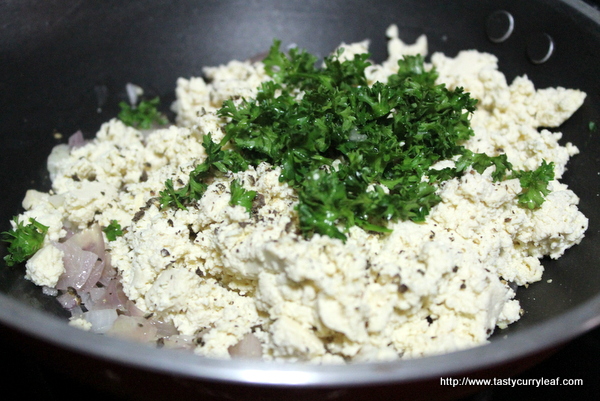
Incase going for garlic powder, add that also at this stage. Mix well and let it cook for another minutes or few more until almost done.

We can go with whatever filling we want. Traditionally mashed red potatoes with caramelized onions is used with meat added for nonvegetarians.

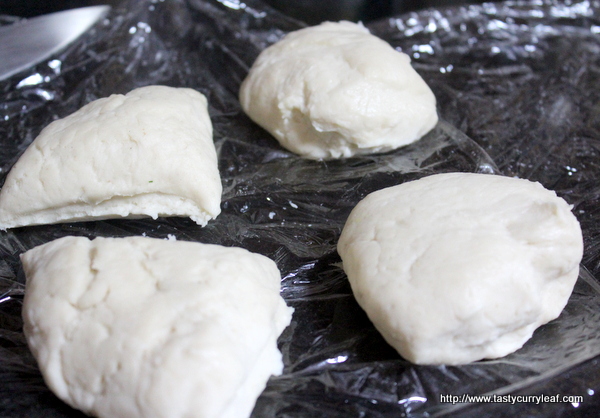
Once the dough is ready divide into 4 portions. Work with one portion while the others are resting.
IMG_0664.JPG

Shape 1: Cylindrical Round : Source : JoePastry
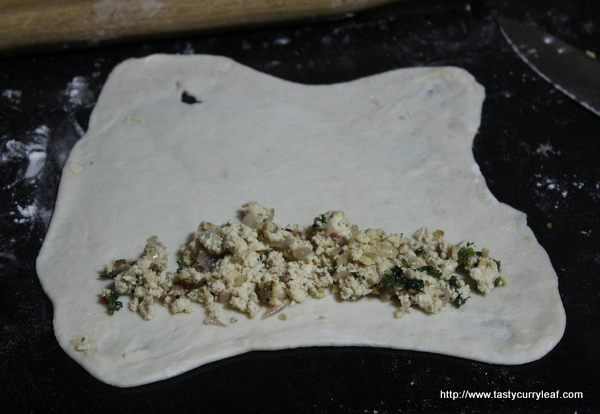
Roll out the dough as thin as possible into a rectangle.
Place a mound of filling on the dough  on the longest side .
IMG_0693.JPG
Enclose the filling with the dough.  This should not be either too tight as it might burst out while baking.
IMG_0694.JPG

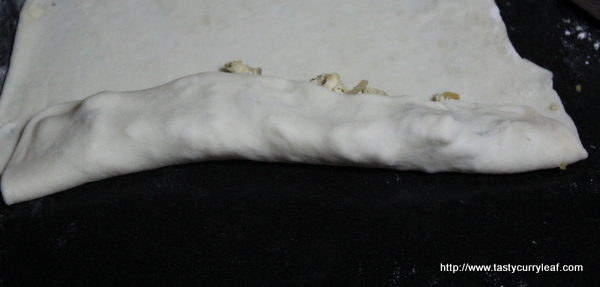
Continue rolling up to get 2 + layers of the dough. The more you roll more flakier you will get the snack. This is the reason why the dough should be rolled out as thin and possible.

You can stop once you get as much layers as you want and trim off the excess (to be used later) using a pizza cutter.
IMG_0667.JPG
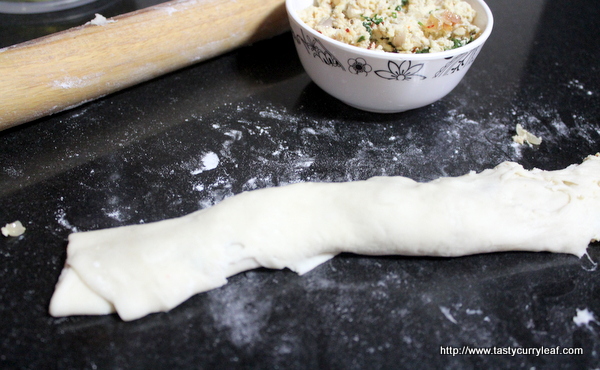
Now decide how big you want you knish. I went for bite sized ones. So select an appropriate  length, give it a pinch with your fingers to mark it.
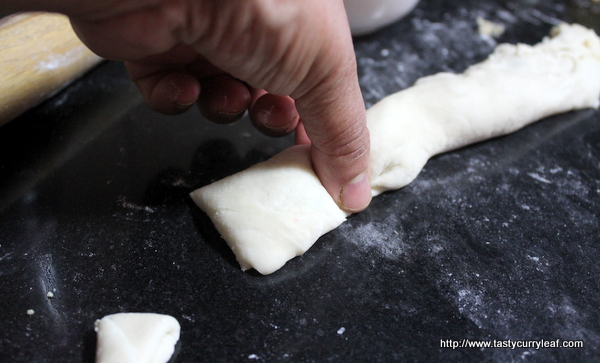
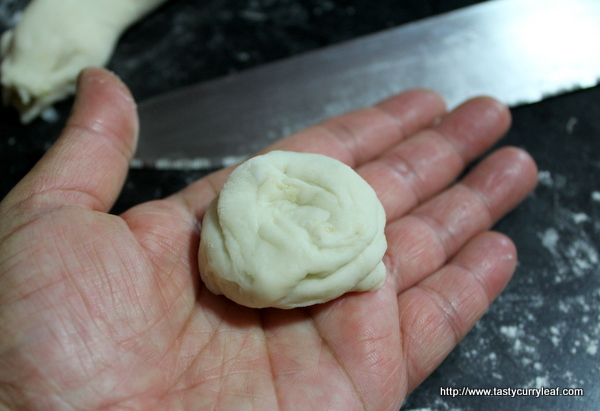
IMG_0668.JPG


Give it a twist.
IMG_0669.JPG

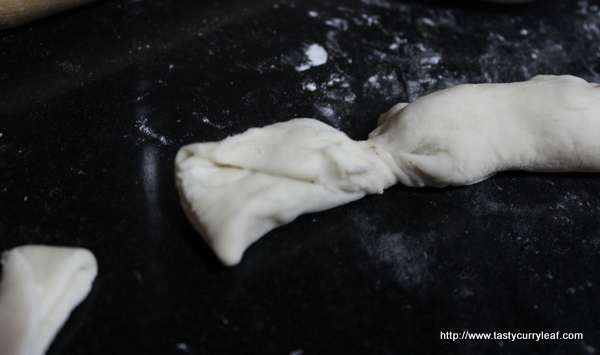
Then using a pizza cutter/knife  or even your palms ,cut it off.
IMG_0671.JPG
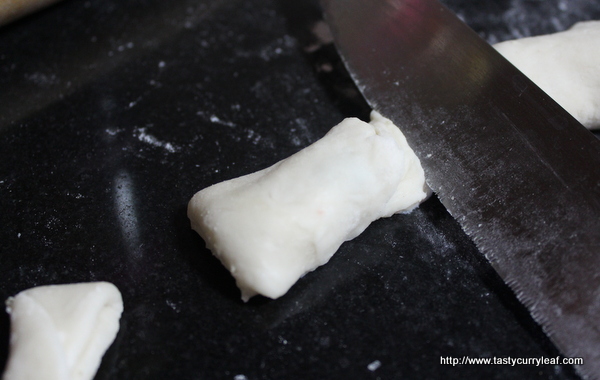
You'll get a small sausage like dough piece. Pinch the ends shuts to enclose the filling.
IMG_0672.JPG
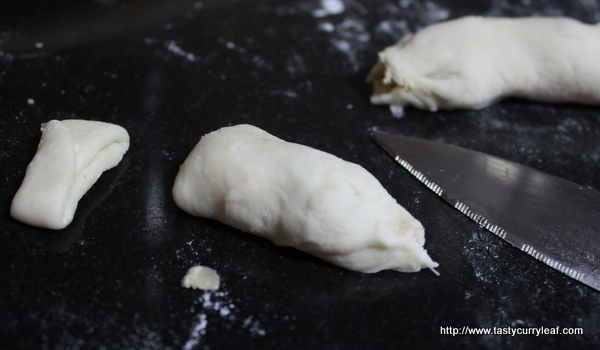
Place it on the counter/palm and push it down with your palm to form a cylinder.
IMG_0674.JPG

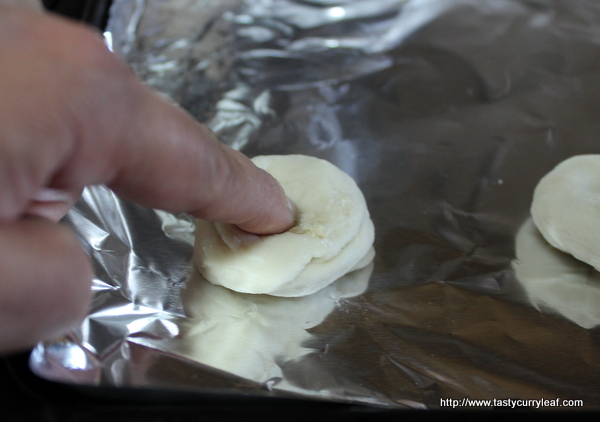
Place it on greased/lined baking pan and press the top down with your finger to keep the center from puffing up in the oven.
IMG_0675.JPG

Repeat the process with the rest of the dough and make other cylinders.

Shape2: Crimped Round:Source: JoePastry

This is another way of making knish.

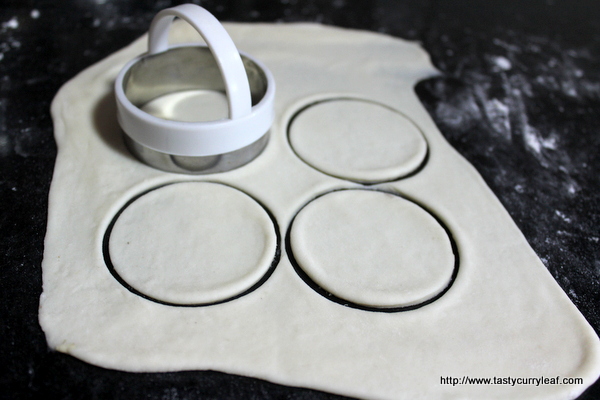
Roll out the dough into a thin rectangle. With a cookie cutter, cut out circles.
IMG_0676.JPG
Place the filling on top of a circle and press it down with with another dough circle on top.
IMG_0678.JPG
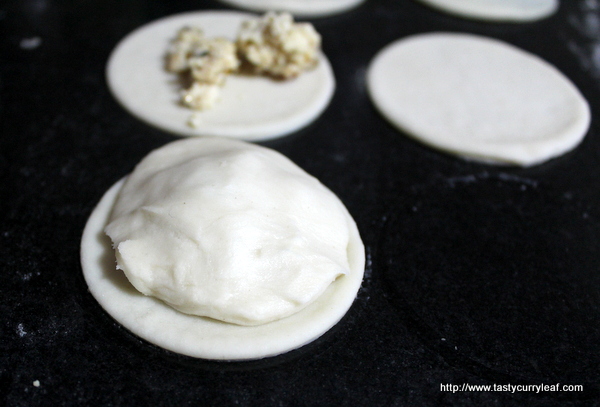
Press the edges lightly to let the air out.
IMG_0679.JPG
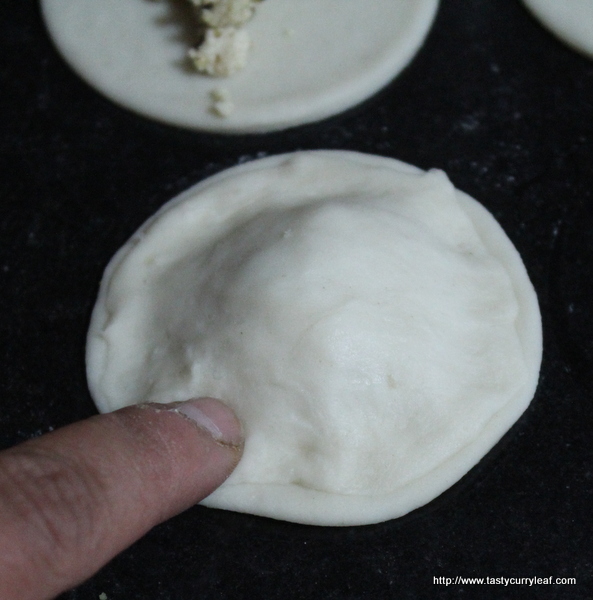
Fold the edges and press to crimp. Then place the knish on the baking sheet with the crimped side down. So that we get a smooth top.
IMG_0680.JPG
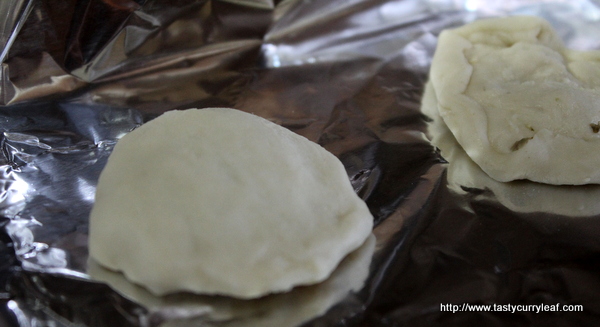
Continue with the rest of the dough circles

Shape 3: Rectangular:

Roll out the dough as thin as possible. Cut into rectangles. Place 2-3 tbsp of filling in the middle.
IMG_0684.JPG
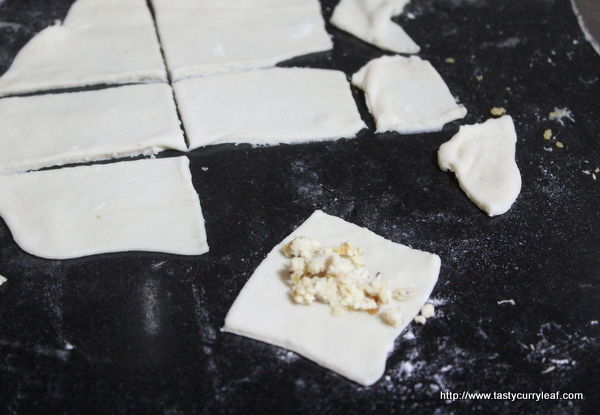
Fold the sides in first
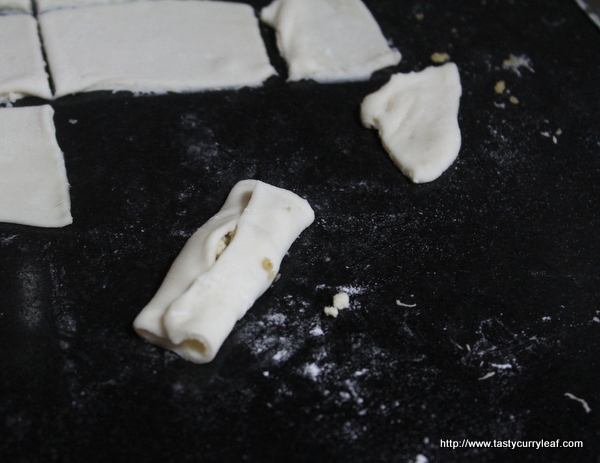
IMG_0685.JPG
and then the ends.
IMG_0689.JPG
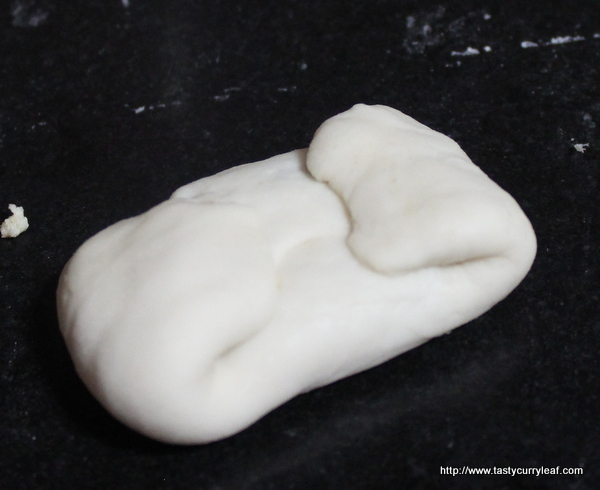
Place the folded side down on the bakingsheet.

IMG_0690.JPG


Bake in a preheated oven at 175C/350F for about 20-25 minutes until the top turns golden.

Serve with your choice of dip.

A simple recipe which can be tweaked as per our convenience and availability of ingredients for fillings. Some authentic recipes contains eggs along with potatoes to make it more rich and moist but this vegan dough is also tasty. In case you are too tired to make your own dough, use any bread dough freezing in your refrigerator. Traditionally potatoes are part of dough or filling, but its upto you to choose otherwise and create yet another tasty pastry.


Sunday, December 20, 2015

Vánocka - Czech Christmas Bread | Baking Partners Dec'15

Now that Christmas is just a few days away it makes sense to post the festive bakes one by one. Especially the christmas festive bread. This time Swathi has chosen a Christmas bread from Czech Republic- Vánocka (va-nawtch-kah) for Baking Partners A Simple sugary brioche type bread but rich with eggs. Now thats where my adaption skills work. I had earlier trid brioche without eggs and it had come out fine. So here too I replaced the egg yolks in the recipe with EnerG egg replacer. Now as per Swathi its like a " curry without salt" but still the bread turned out perfect. As usual I halved the recipe and read it below..


Ingredients:
All Purpose Flour: 2 cups
Salt: 1/8 tsp
Sugar: 3.25 tbsp
Instant Yeast: 2 tsp
Lemon zest: 1/2 a lemon
Grated Nutmeg: 1/2 tsp

Vanilla :1/2 tsp
Lukewarm milk: 1/2 cup (100ml)
Butter: 4 tbsp melted
Egg Yolk: 1 (1.5 pkd tsp of Ener G + 1 tbsp of water)

Raisins: 1/4 cup
Peeled almonds: 8 tsp

Egg wash: 1 egg + 1 tbsp of water

Preparation: 
In a big bowl, mix together flour,salt,sugar, yeast, nutmeg and lemon zest. Add in the vanilla, butter, milk and egg yolk in the well in the middle and start stirring with a spoon mixing into the surrounding flour. Once the dough becomes too stiff for a spoon, begin t knead it with onehand trying to incorporate tje remaining flour. If the dough is too dry/crumbly, add in 2-3  tbsps of milk.

Turn the dough into to a counter and knead for another 10 minutes prying apart the dough with the  lower part of your palms, fold in half and twist and repeat this till you get a smooth soft dough.

Transfer the dough to a lightly greased pan and let it sit in a warm place until it doubles in volume. Meanwhile heat water in a bowl and add raisins. Let it boil until  it plumps up. Drain on a kitchen towel and set aside.

Transfer the dough on to a lightly dusted surface and place the raisins on top if it. Try to incorporate the raisins into the dough while kneading.

Divide the dough into 9 equal parts and roll out each about 15cm long cylinder.Take the first 4 cylinders and lay them next to each other .

Join at one end and then bring the first one at extreme left over the third one. And bring the fourth one at extreme right over the top of second one. Now the earlier frst one has become 4th and the previous 4th has become 1st. Repeat the steps 1 over 3 and 4 over 2 and join the ends to get a beautiful 4 stranded braid, Keep it aside.

Take the next 3 strands and make a three braided dough and keep it aside.

Make a 2 stranded braid with the remaining two.

Place the 4 braided piece on a lined baking sheet and bake a slight depression in the middle so it can hold the other two braids. Place the three braid bread ontop of this followed by the two braided. If there are loose ends try to tuck underneath the entire bread.

Stick almonds on the sides -either sliced or whole peeled. Then stick toothpicks in between so that it doesn't flip during baking.

Preheat the oven to 350F /175C while the dough is resting - which should not be more than 30 mnts. Brush the bread with egg wash  or milk/butter  and bake for about 38-42 minutes making sure the top doesn't brown too much.. in which case cover it with a foil.
 After removing from the oven sprinkle with powdered sugar /glaze and let it cool completely.Slice into pieces and serves.


An excellent raisin bread. The aroma of sugar and raisin definitley gives a festive feel.The original recipe adapted from here and which came from Swathi sugested baking time of 38 minutes, but my eggless version definitely took few extra minutes as I have seen in some of the egg replacer preparations. I suppose this is because the egg replacer powder is made up of different plant based startces which take longer time to cook.

Lets see who all baked Vánocka for Christmas. Hope over to Swathi's

Saturday, November 21, 2015

Chilli Cheese Corn Bread | Baking Partners October '15

Diwali came and went in between rains. It was almost a wet Diwali  but it was nice to simply sit and chat doing nothing. Though I made regular sweets I didn't touch my computer or look at my blog those days. Now that one festival is over, we can slowly think of cooking clicking and posting about another festival which we don not celebrate much ieThanksgiving. 

I am more interested in experimenting with various festive dishes from other cuisines. This time  Southern style corn bread was suggested by Suja of KitchenCorner for Baking Partners by Swathi. The recipe is adapted from Weight Watchers CookBook and 1001 Great recipes around the world, Culinary Institute New York. As usual I tried the eggless  version replacing eggs with Ener G egg replacer and it came out right on time pretty good but  read on...

Ingredients:
Makai ka Aatta / Yellow Cornflour: 1.5 cups
All Purpose Flour: 1 cup
Baking Powder: 2 tsp
Salt: 1/4 tsp
Brown Sugar: 2 tbsp

Egg: 2 OR Ener G Egg: 1 tbsp pkd Powder whipped with 4-5 tbsp of water
Vegetable Oil: 4 tbsp
Buttermilk: 1 cup
Milk: 1/2 cup

Carrot grated/shredded: 1/3 cup (optional)
Green chillies : 1-2 minced
Corn: 1/2 cup
Cheddar cheese : 1 cup/shredded

Preparation: 
Mix cornmeal, flour, baking powder, salt and sugar and set aside.

Beat in eggs and blend in oil,milk and buttermilk. Add in the dry flour mix and fold in the carrot,chillies, corn and cheese.

Pour in a greased 8" pan and bake in a preheated oven at 400F/ 200C for 25-30 minutes or until a toothpick inserted in the middle comes out clean. The bread will be light brown and crispy in the edges.If you have a skillet, heat in butter in it on a stovetop. And bake the bread in same skillet. 

The bread looked perfect from outside. Its taste was yum but texture was something I was not happy with. It was not light fluffy texture. But slightly heavier/thicker I  felt. Taste was excellent what with corn and carrot and chillies. But may be these made it thicker or pastier I felt. It was cooked perfectly, the tester in the middle had come out clean. 


Normally when I replace eggs some baked dishes take more time. This time also I had anticipated it , but the bread was done in exactly 30 minutes and top started browning a bit more that I wanted and hence I had pulled it out. But I let it cool completely in the pan and before cutting it.Next time definitely I will be playing around with the temperature and different ingredients and spices. 


Monday, October 26, 2015

Bell Pepper Quiche | Baking Partners October '15

Its back to school again now that festival is over. Actually its just a break.. Diwali starts in two weeks. In between there are weekends, government holidays, sports/annual day.. and then wind up everything for december and new year. Anyways, now that I am getting time to post so I thought I would start with Baking Partners Quiche challenge suggested by Arthy of Cook with Arthy Shama.

 Normally quiche is an open faced savoury pie, consisting of filling topped with eggy custard which is baked to set and then cut into pieces and served. As usual I went for eggless version, making the custard using tofu. You can actually go completely vegan with this by replacing the butter in the dough with olive oil which will make it more healthy too. The tofu using idea is from Vaishali's Coriander Quiche, a recipe I had bookmarked long ago.

I stuck to the given recipe for the crust as given by Arthy and made filling with different coloured bell peppers or capsicum that I had got through a friend from an organic farm. When you know you are not eating some posionous stuff then cooking is more easy and obviously enjoyable.

Ingredients:

Crust:
All Purpose Flour: 150gms /1 cup
Salt: 1/2 tsp
Cold Unsalted Butter: 85 gms ~7 tbsp (cubed )
Cold Water: 1-1.5 tbsp

Filling: 
Bell Peppers: different colours: chopped  into small pieces 1/2 cup total  atleast
Onion: 1/4 cup chopped
Salt,Spices & Seasonings of your choice : as per taste

Egg: 1 or Tofu (100g) + little water + salt + 1 tsp riceflour and dash of chilli flakes creamed together to form a thick custard

Cheese: for sprinkling at the bottom (optional)

Preparation:

Crust:
In  deep bowl, mix together flour and salt. Add in small cubed chilled butter and pinch and fluff to get a coarse sand like flour. Add in cold water 1 tbsp at a time and mix well until a soft dough is formed. Be gentle with the dough. It might not come together at first but don't put too much force/pressure on it.

Put the dough in a cling wrap and refrigerate it for atleast two hours or overnight. Take it out on the day you are planning to bake and let it sit for 15-20 minutes at room temperature.

Roll out the dough within butter paper or plastic film to a large pie crust or mini ones based on the size of your pie pan. Place it on greased pie pan or mini ones as per choice . Shape them according to the edges of pie pan and press down the dough so that it touches the base and sides of pie pans.

Prick the shaped dough throughout the base and sides using a fork so that it doesn't rise during baking. Refriegerate the pie pans for 15-20minutes. Meanwhile you preheat the oven to 190C.

Take out the piepans and fill them with dried beans or rice. We r going for blind baking. That is baking the pies without any filling and the dried lentils will ensure there isn't any uneven rising.

Bake the pies for 15-20 minutes until the edges start browning and they leave the sides of the pan. Take out and let it cool. You can even refrigerate them for use at a later time if your filling is not ready.

Filling:
Heat little olive oil in a deep pan and saute onions, followed by bell peppers adding salt and seasonings as per taste. Saute until the raw smell goes and keep aside for cooling.

Prepare your custard by grinding together tofu, water, rice flour and spices till it is thick but free flowing custard consistency.

Assembly:
Spread the cheese on the base. Then spread the filling followed by custard and more cheese as per taste.

Bake in a preheated oven at 190C for about 20-25 minutes until the filling is firm or set. Take out let it sit for a while and then serve ..


A simple eggless quiche with the same taste of a regular quiche. I didn't find any difference in taste and looks from the regular one. Those who don't prefer tofu can try with paneer as well.

I used to enjoy spinach and corn quiche from Cakewalk in Indiranagar, Bengaluru every time we used to go that side. That too was eggless and I remember questioning the staff on how they could claim it to be eggless. But they used to swear it was egg free.  Ofcourse now I am planning to recreate the same at home.

Meanwhile hop over to Swathi's to see who all made a quiche to go with their tea or as sides /main.


Tuesday, September 22, 2015

Tomato Onion Galette | Baking Partners September Challenge

Galette is a French term for free form or rustic cakes, pies or pastries - sweet as well as savoury. Based on the size and content these can be used a side ,snack or dessert. These are most popular as desserts though. I remember baking apple galette for Suma Rowjee

I had mentioned it here though I am yet to post the recipe. This time when Suja of Kitchen Corner suggested Galette for Baking Partners Challenge by Swathi I decided to go for a simple savoury tomato onion thyme galette. I went with the same recipe suggested by Suja and filling I just did mine.

Ingredients:
All Purpose Flour: 1 cup
Cake Flour: 1/2 cup (7 tbsp apf + 1 tbsp semolina/cornmeal/cornstarch)
Sugar: 2 tbsp
Salt: 1/4 tsp

Butter: 8 tbsp chilled

Ice cold water: 4 tbsp

Preparation:
In a bowl, mix flours, salt and sugar. Cut butter in small cubes and add it to the flour mix. Using a pastry blender, cut in through the flour or if using hands pinch and fluff the mix until it becomes coarse and resembles sand. The flour should look like large flakes and butter should be pea sized.You can do this in a processor also.
Slowly add water in tbsp and mix until the dough starts coming together. Transfer the dough onto a lightly dusted counter. Flatten the dough like  rectangle with the heel of your palm to a side away from you, starting from the top left corner to the bottom facing you.

Pat and smooth the top and cover the rectangle like an envelope by bringing the bottom to the middle and the top down on it and tuck the sides towards the bottom and make it like a round ball. Cover it in a plasatic wrap and chill it for atleast half an hour or upto two days.

Meanwhile prepare the filling. 

I just thinly sliced tomatoes and thinly chopped onions and used these with salt, pepper and thyme. You can actually salt the tomato slices and leave them on a rack so that the juice drains off and even caramelize onions. This ensures the dish is done faster and the pastry doesnt turn soggy.

Once the dough is ready and you are ready to bake the galette, take out the dough from fridge and place on a floured counter. Roll it out into 1/8" thick circles. Cut into desired shapes and carefully transfer to a baking sheet which is optionally lined/greased. 

Sprinkle around 1-2 tbsp of cornstarch/semolina/flour on top.Arrange the filling around leaving atleast 2-3 inches border. Fold the edges around the filling forming loose pleats. Gently press the pleats together so that it sticks together.

Bake in a preheated oven at 180C for 20 minutes or more until the filling starts to get cooking (the onions get caramelized look) and the crust turns brown.Remove the baking sheet from the oven and after 5-10 minutes remove the galette to a wirerack to cool completely before serving.


I made medium sized ones by halving the dough and served as a snack. It was yum and tomato, onions and thyme complemented tea very well. The pastry is buttery  but for the chilly weather its perfect.

Lets see the other options and who went sweet or savoury this month. Join me to check out  Swathi's post.

Tuesday, August 18, 2015

Bagels, Bagels, Bagels | Baking Partners Aug '15

It was so long since I baked bagels. I had baked wholewheat bagels long back and since then the original has always been on my to-do list. I regretted not making these earlier when I tasted the perfect bagels all thanks to Baking Partners August challenge given by Swathi. The recipe is adapted from Peter Reinhart's artisan Bread Everyday.


Ingredients:

Honey : 1 tbsp
Instant Yeast: 1 tsp
Coarse Kosher Salt: 1.5 tsp ( or 1 tsp regular salt)
Lukewarm water: 1 cup + 2 tbsp

Bread Flour: 3.5 cups (3.5 cups All purpose Flour + 3.5 tsp of Vital wheat gluten)

Poaching liquid
Water: 4-6 cups
Honey (optional) : 1.5 tbsp
Baking Soda: 1 tbsp
Salt: 1 tsp


Preparation:

Day 1
Stir in the honey, yeast and salt into water in a small bowl.

Place the flour in a big/deep bowl and add in the wet mix.
Stir in with a sturdy spoon for about 3 minutes until well blended to form a wet coarse dough mass. 
Rest for 5 minutes.

Transfer to a lightly dusted surface and knead by hand for another 3 minutes to  smooth out the dough.

Place the dough in a clean, lightly greased bowl, and let it rise for an hour at room temperature covered tightly with a plastic wrap.

After this you can refrigerate it overnight or shape into bagels and then refrigerate.For shaping bagels read below

While the dough is rising, prepare a baking sheet with lining and lightly grease the lining.

Divide the dough into 6 pieces. Take each piece and shape into a loose ball with a cupped hand on wet surfeace and not floured unlike the first kneading. Water will help provide the enough traction for the dough to form into a ball. 

Poke a hole through the centre of the ball to create a donut shape.

Holding the dough with both thumbs in the hole. rotate the dough with your hands, gradually stretching it to create a hole 2" in diameter.

Place the bagel on prepared sheet, spray the top lightly with oil. Repeat the process until all bagels are ready. Cover the pan with a plastic wrap and refrigerate it overnight or for upto 2 days.

Day 2: Baking Day:

Remove the bagels 1.5 hours before you plan to bake them. If you had chilled as a whole dough then shape it into bagels and let them proof before rising.This proofing is optional and you can directly go to the next step.

Check immediately whether they are ready for baking using the float test. : Place a bagel in a small bowl of cold water.

If it sinks and doesn't float back to the surface, shake it off, return to the baking and let it rest/proof for another 30 minute before repeating the test again.

One bagel passing indicates all bagel passing. Now they all are ready to be boiled and baked.

If you are not ready for baking then return them to the refrigerator so that they don't overproof.

When you are about to bake the bagels, bring the water to boil, reduce to simmer, stir in honey, baking soda and salt. 

Gently lower each bagel into the simmering poaching liquid adding as many as will fit the pot, they should all float to the surface withing 15 seconds. After a minute,use a slotted spoon to turn each bagel over. Poach for another 30-60 seconds,then use the slotted spoon to transfer it back to the pan, domed side up.Mine were done within 15 seconds per side. 

Sprinkle on a genourous amount of toppings as soon as they are out of the water.I used regular white and black sesame seeds.

Bake in a preheated oven (preheat the oven to 500F/260 C 30 minutes prior to baking, transfer the bagel to oven,reduce the temp to 450F/ 232C) for 8 minutes.Then rotate the pan and also check the underside of bagels. If they are getting too dark, double the baking pan. Bake for another 8-12 minutes until they are golden brown.

My max oven temperature was 250C and I preheated the oven at this temperature. Then placed the baking tray and reduced it to 220 and then cooked for 7 minutes as they started browning at this stage.

Then rotated the pan and reduced the temperature to 200,doubled/insulated with another baking tray  and then continued for another 5-6 minutes before they started burning.

Take out and let these cool on wirerack atleast for another 30 minutes before slicing and serving them with your choice of spreads or as such.


Perfect bagel. I loved it as such. Serve it for breakfast or if you don't mind as anytime snack with your choice of dip or spread.
The texture was not too soft crumb with a firmer crust. similar to sandwich bread but firmer/thicker and it had perfect soda aroma that makes sure its different from other breads.

Lets see who all  baked bagels this time with us. Hop over to Swathis Post grabbing a bagel...


Friday, June 26, 2015

Salted Caramel Pots de Crème | Baking Partners June '15

A break when extended for too long will make you rusty. Thats exactly what has happened to me. The rusty lazy holiday feeling aggravated thanks to the lazy weather in Bengaluru. But nothing could stop me from trying out the salted caramel pots de crème suggested by Tamy of SavoryKitchen Table  which was this months challenge for Baking Partners by  Swathi

Pots De Crème is the French name for Custard. And custard is something which is simple yet can go wrong . But with custard powder its hard to fail. Custard powder makes it all the more easy and thats exactly what the doctor ordered. Though two choices were there I chose the salted caramel version. Since my family is not very big on caramel though I am, I decided to experiment the recipe and also use the custard powder instead of using the eggs. Still the below given measurements are guestimates as I improvised at some steps.

Ingredients:
Sugar: 8 tbsp + more for custard
Water: 2 tbsp
Sea Salt: a big pinch
Whipping Cream: 1 1/4 cup
Custard Powder : 3 tbsp  
Milk: 3/4 cup
salt: 1/2 tsp (For garnish)

Preparation:

Preheat the oven to 160 C/ 325F. Adjust racks of the oven and prepare ramekins on a baking dish. Add enough water in the baking dish to go go halfway up the sides of the ramekins.

In a saucepan add sugar, salt and water. Heat until sugar completely dissolves, stirring. Increase heat and bring the mixture to a rolling boil.
Boil for 8 minutes until you get a deep amber color. 
At the same time in another saucepan heat about 1/2 cup of milk adding around 3-4 tbsp of sugar and cook stirring until the sugar dissolves and it comes to a boil. 
In a separate bowl, whisk together the remaining milk and custard powder into a paste. When the milk +sugar mix boil, reduce the heat and stir in the custard paste. Continue cooking till the sauce thickens. And then remove from heat and let it cool for a while. 

Meanwhile whip the cream with powdered sugar till soft peaks form. Once the custard mix is cooled a bit, fold in the cream to this.

Put the caramel back on fire at low heat and add in the cream+ custard  mixture whisking well so that it flavours the custard properly and we get a brownish thick sauce. 

Remove from heat and sieve into a bowl. From the bowl pour into ramekins. Bake the ramekins for 35-40 minutes until the edges are set and centres become jiggly.

Cool completely on wirerack. Cover with a plastic wrap//saran and chill for atleast 4 hours before serving garnish with more salt.

Mine was a perfect pot de crème texturewise . But tastewise it was a bit more bitter than I expected. Maybe the sugar needs to be adjusted next time. 


Hopefully this will set the ball rolling for more posts.. Lets see how others did the challenge.

Friday, June 5, 2015

Elvis' Favourite Vanilla Pound Cake - Eggless Experiment | Baking Partners May 2015

Its good to be back after some rest and recuperation. Did nothing much for few days and now slowly settling back into the old routine all thanks to school . Anyways once the schools reopened, the first thing I baked was the Baking Partners May challenge Pound cake - that too Elvis Presley's favourite adapated from Gourmet.com thanks to Swathi. I further adapted it by making it eggless and halving it ..

Ingredients:

Unsalted Buter: 4 tbsp soft + more for buttering
Sifted Cake Flour: 3/4 cup ( 1 cup cake flour = 14 tbsp all purpose flour + 2 tbsp cornstarch)
Salt: 1/6 tsp
Sugar: 10 tbsp
Egg Replacer Eggs: 2 (1 packed tbsp of Ener G + 5 tbsp of water)
Vanilla: 1 tsp
Cream: 4 tbsp

Preparation: 
After making cake flour at home, sift it 5 times and then add salt and sift again.

Beat together butter ad sugar with mixer at medium speed until pale and fluffy for about 5 minutes.

Add in the eggs one at a time or Ener G eggs beating well after each addition. Beat in vanilla.

Add in half of the cake flour then cream and then the remaining flour, mixin well after each addition at a very low speed.

Beat in at medium high speed for about 5 more minutes scraping the sides of the bowl until the batter becomes creamy and satiny.

Transfer to a buttered and floured pan and tap it twice to eliminate the air bubble.

Place the pan in a cold oven and switch it on to 350F/ 150 C. Bake until golden and a tester comes out with a few crumbs when inserted in the middle for about 1-1 1/4 hours.

Mine took roughly 2 hours. Some vegan dishes take time to reach the correct texture and consistency. In between the top started turning brown, so I covered it with aluminium foil. Continue baking at 150C till the tester in the middle comes out with cooked crumbs.

Cool cake in pan for 30 minutes on a rack. Run a knife around the edges of cake and then invert the rack over pan and invert the cake onto rack and cool completely.

Serve as slices anytime especially with tea. 


Dunno whether Elvis had tried or even thought about eggless or vegan goods when he enjoyed the cakes, but yes, he would have definitely given a thumbs up. 

The taste was excellent but the texture was a little dry. Despite 2 hours, it still needed extra time  I felt. This could be because I sliced it before cooling completely. Anyways it was an experiment which I would be repeating again with more baking time.
  

Tuesday, March 17, 2015

Orange Blossom Brioche Rolls | Baking Partners March 2015

Brioche is a bread which always makes me feel that I am doing something different. or rather a different cuisine. Ofcourse its French. Its just that I get the French feeling more than the bread baking feeling. Also this time around it was Moroccanish as we all baked a Orange scented brioche for Baking Partners chosen by Swathi. The recipe is adapted from Dominic Ansel's : The Secret Recipes cookbook.

What surprised me was the texture of brioche. It was light and airy. Whereas the ones I had tried earlier were definitely airy but slightly tighter or not as airy as this one.It was more commercial brioche like from the brioches I had tried. As usual I halved the recipe and mine is as follows. But definitely the orange extract I added also doubled up as the colour as it gave my dough a bright orange colour. I baked these in floral muffin tins and they retained the colour and shape.

Ingredients:

Bread Flour: 1 cup (1 cup All Purpose Flour + 1 tsp of Vital wheat gluten)
Salt: 1/4 tsp
Sugar: 2 tbsp
Instant Yeast: 1 & 1/8 tsp
Eggs: 2 (Ener G Egg: 1 tbsp Pkd Powder + 4-5 tbsp water)
Milk: 1.5 tsp

Cold Unsalted Butter: 5 tbsp diced small

Orange extract: 1/8tsp (optional) (I added and it coloured the dough)
Grated orange zest: of 1 orange
Orange Blossom water: 1/2 tsp

Preparation:
Combine flour, salt,sugar, yeast,milk and eggs and mix well using hand or processor.

Mix well until combined kneading for around 10-15 minutes so that  gluten is developed and it leaves the sides of the bowl and it passes the window pane test. (You stretch the dough and it lets you see through without breaking it)

Add cold butter and incorporate well.

Add the orange extract,zest and blossom water and mix well so that the dough is flavoured and we get a smooth sticky and shiny mass of dough,.

Transfer the dough to a lightly oiled bowl. Cover with a wrap pressed directly on top of the dough (to prevent a skin forming) . Let it sit at room/warm temperature until doubled in size about 1.5 hours.

Remove the wrap and punch down by folding. Cover again with the wrap pressed directly on the dough surface and refrigerate overnight to relax the gluten.

When you are ready to bake the next day, transfer it to a floured counter and divide into small pieces shaping it the way you want and placing it in appropriate pan/sheet which is greased and lined. I went for floral shaped muffin pan.Let these puff well for an hour. 

Brush with an egg wash (I forgot!!!) and bake them for 10 minutes until golden brown in a preheated oven at 400F/200C.

Let these sit in the muffin pan for another 5 minutes after which remove these onto a wirerack and enjoy as such.


What came out of the oven was airy and light brioche. It was like a feather in hands and was spongy when cut open. I loved it with nutella whereas my husband liked it as such. 


A little research and found that there are two ways of making brioche. Its the addition of butter that makes all difference. When butter is added after the gluten is developed as in here it gives rise to airy and light ones as in here. Whereas when butter is added along with other ingredients then it become more cakey or soft bread like and tighter as in the previous cloverleaf rolls.

With all this gyan hop over to Swathi's and see who all baked the brioche.


Thanks for visiting my Blog

/*TYNT script starts here */ /*TYNT ends */